Diego Rivera's Sugar Cane
Presently a part of the permanent collection of the Philadelphia Museum of Art (PMA), Diego Rivera's, Sugar Cane, was one of eight "portable" frescos constructed in 1931 for the Rivera retrospective held at the Museum of Modern Art. The fresco is supported by concrete applied over a metal armature, and contained within a metal frame. Three additional layers of lime and marble plaster were applied over the concrete base. Painted with raw pigments on wet lime plaster, Sugar Cane is a surperb example of Rivera’s mastery of the buon fresco technique.
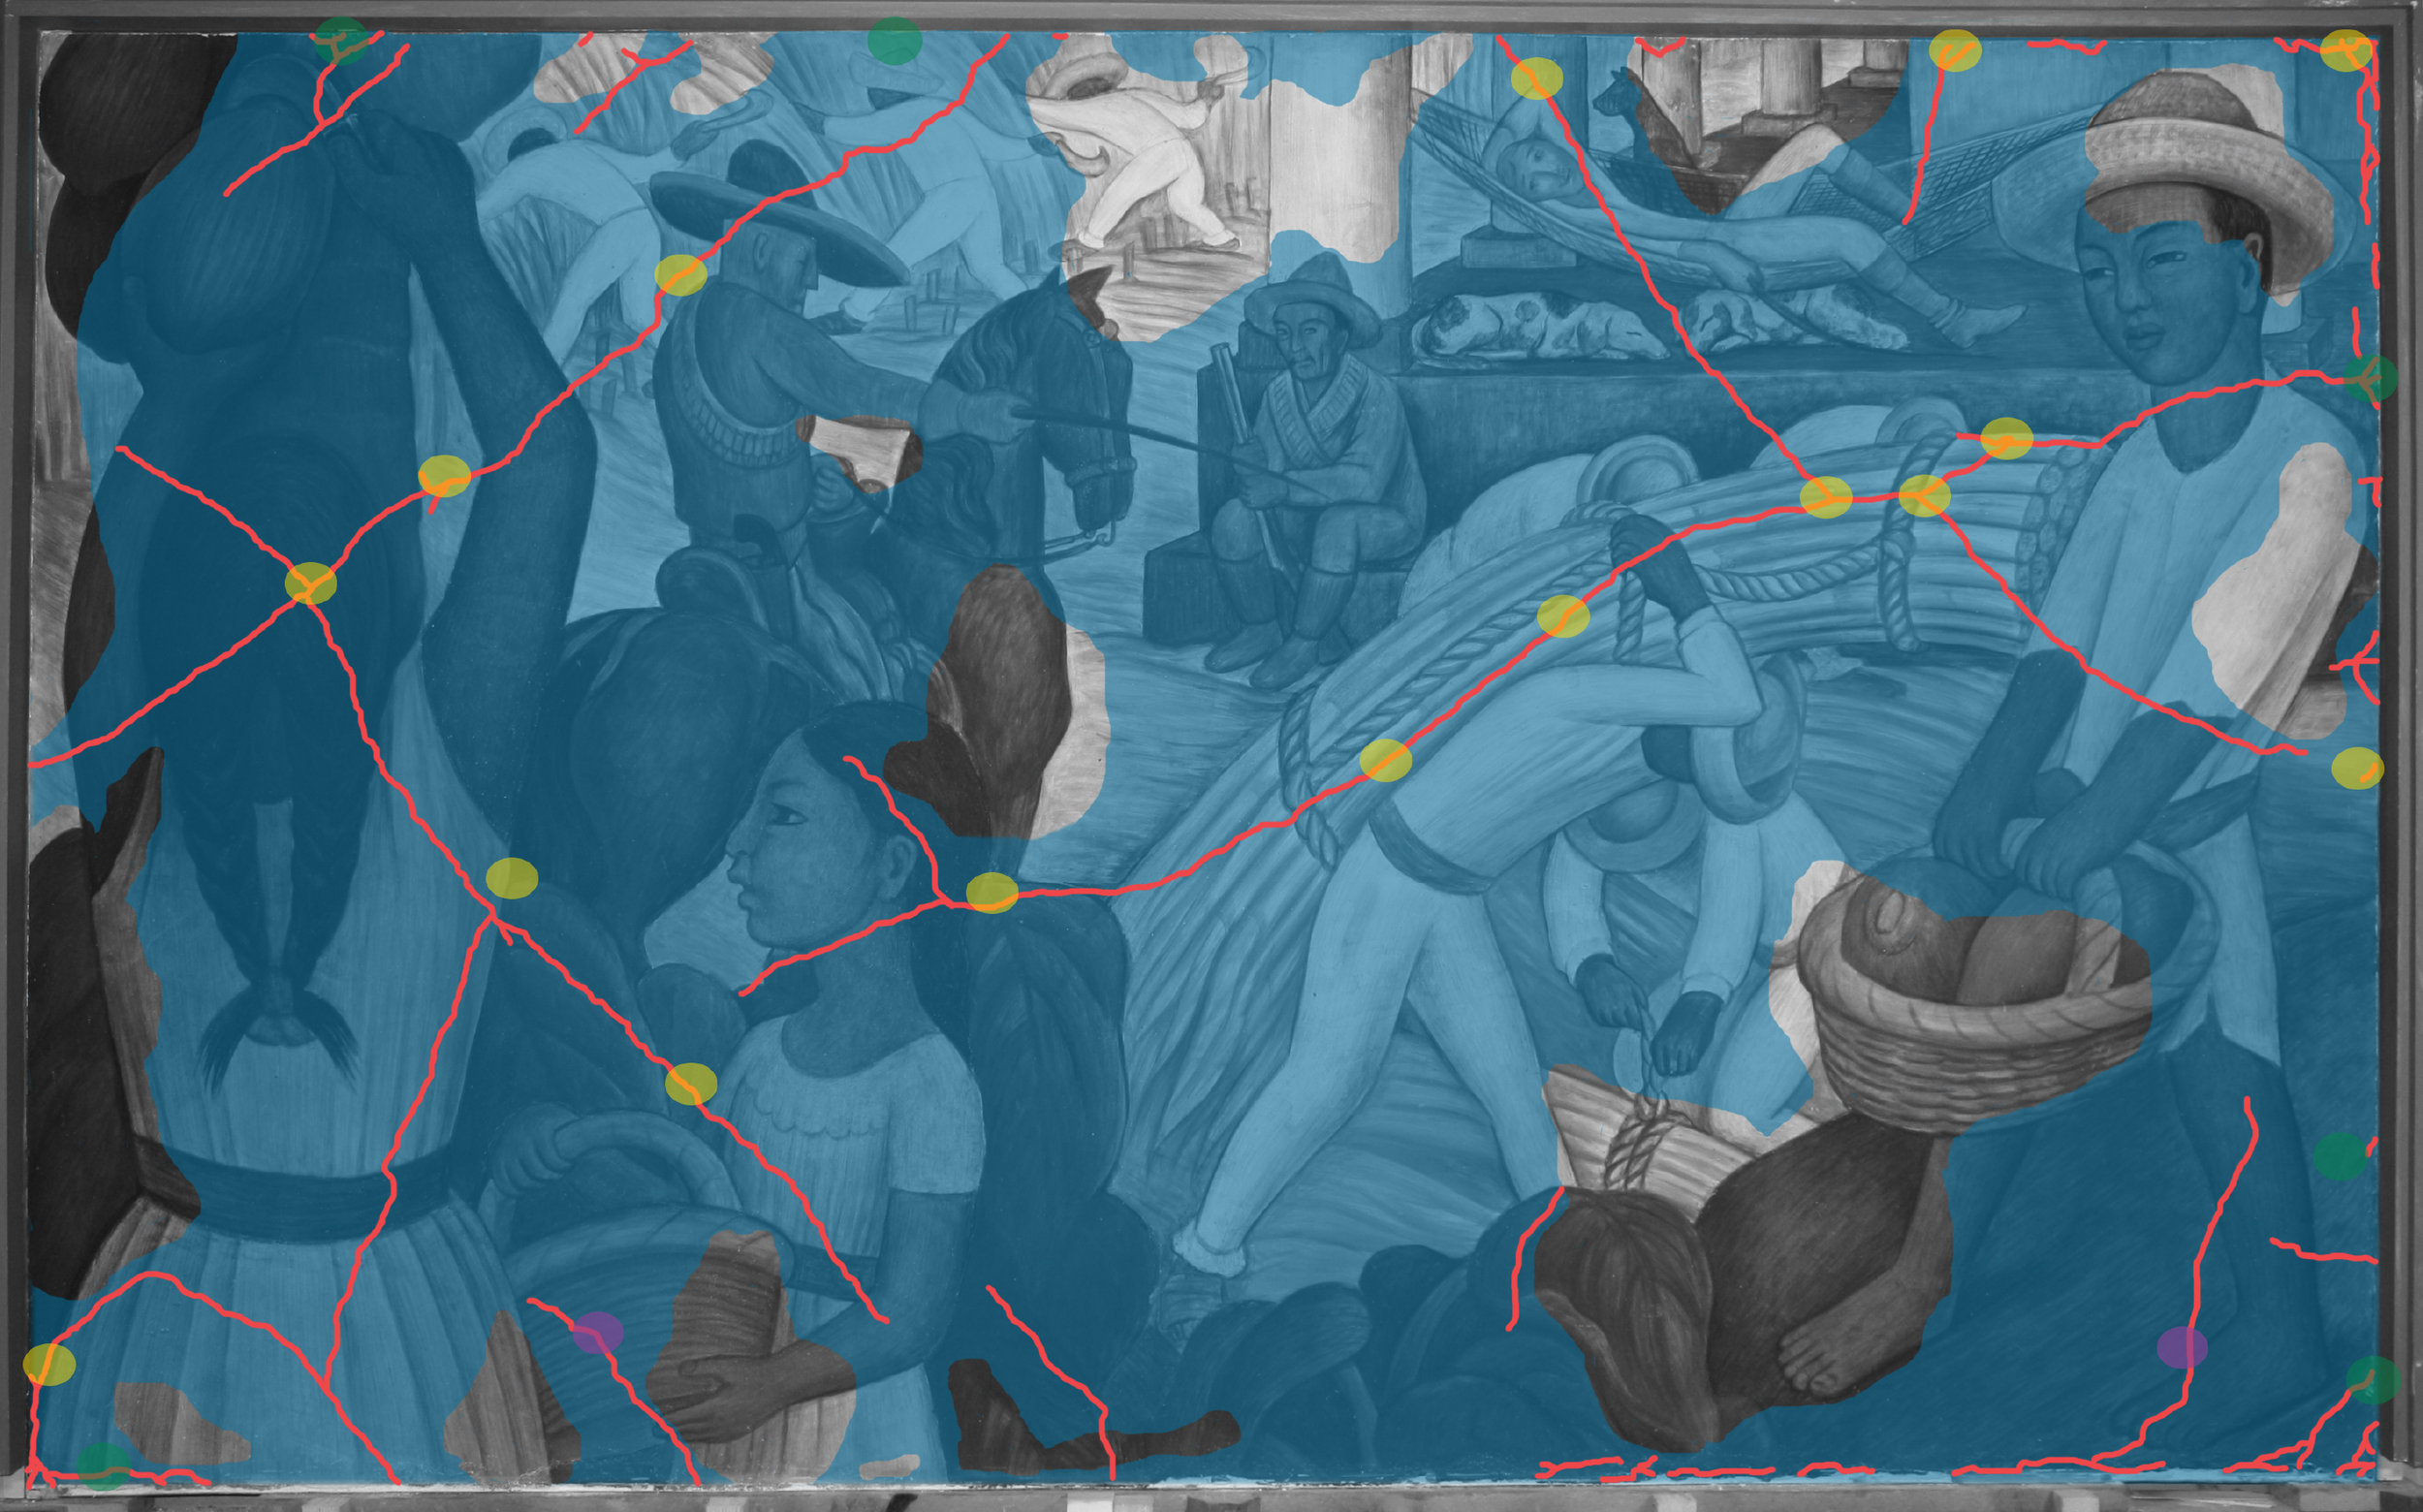
In 2014, Kiernan Graves and Katey Corda were commissioned by the PMA to undertake conservation treatment of Sugar Cane. While the paint layer was found to be in a generally stable condition, detachment between support layers was occuring throughout. As a result, long, diagonal and intersecting cracks had developed in the plaster with associated displacement. The extent of the detachment was assessed to be around 85% of the total surface area and thought to be ongoing. Decohesion of the original lime plaster was also found along the base where there have been repeated cycles of repair and loss.
Conservation was intended to address the severe detachment and stabilize the painting for display, movement within the museum, possible transport beyond, as well as mitigate any ongoing deterioration. The intervention included a light surface cleaning, plaster consolidation, injection grouting, and filling and reintegration of losses.
A purpose-built metal frame, contains the painting's internal armature and supporting plaster layers.
Image © K.Corda/K.Graves, 2014
Following the buon fresco tradition, Rivera painted Sugar Cane in a series of giornata. A seam where one giornata abuts another is shown in raking light.
Image © Kiernan Graves, 2014
Rivera used a cartoon to transfer an outline of his composition to the wet plaster surface before beginning to paint. An incision made during the transfer process is visible in raking light. Note the slight alteration in composition made during the painting phase.
Image © K.Corda/K.Graves, 2014
Rivera used a cartoon to transfer an outline of his composition to the wet plaster surface before beginning to paint. An incision made during the transfer process is visible in raking light. Note the slight alteration in composition made during the painting phase.
Image © K.Corda/K.Graves, 2014
The most significant losses were located along the bottom edge of the fresco. The lower left corner is shown in normal (left) and raking (right) light prior to treatment.
Image © K.Corda/K.Graves, 2014
Areas of concentric, semi-circular cracking and loss were also noted along the bottom, indicating previous stressing or flexing of the plaster.
Image © K.Corda/K.Graves, 2014
Scratches and abrasions in the paint and upper plaster layers were noted across the fresco's surface. Some had been previously in-painted and were discoloring.
Image © K.Corda/K.Graves, 2014
Cracks transversed the painting diagonally, ranging in length from a few inches to multiple feet.
Image © K.Corda/K.Graves, 2014
Areas of most severe detachment were associated with the intersection of cracks towards the center of the painting.
Image © K.Corda/K.Graves, 2014
Detail showing the intersection of multiple cracks.
Image © K.Corda/K.Graves, 2014
Bulging or deformation of the most severely detached areas was visible in raking light.
Image © K.Corda/K.Graves, 2014
Cracks (indicated by pink lines) and areas of detachment (indicated by blue) were graphically mapped to help understand their correlation. Due to the vast area of detachment and lack of access to the substrate from edges or central losses, holes had to be drilled though the surface of the painting to facilitate injection grouting. Drilling locations were strategically planned along existing damages and kept to an absolute minimum. The planned drilling locations are indicated by the yellow dots. (*Note: Dots are not to scale. Actual size of holes was far smaller than shown).
In preparation for drilling, the strategically identified locations were faced with a double layer of Japanese tissue paper to protect the surrounding paint and plaster.
Image © K.Corda/K.Graves, 2014
A dremmel drill was used to carefully drill though the lime plaster layers, down to the cement support. Holes were placed over existing losses or cracks and were a maximum of 1cm in diameter.
Image © K.Corda/K.Graves, 2014
A grout, composed of materials compatible with the original, was customized for stabilization of the plaster support.
Image © K.Corda/K.Graves, 2014
Area prepared for consolidation and injection grouting.
Image © K.Corda/K.Graves, 2014
Cotton wool was used to block holes where the liquid consolidant and grout could potentially leak out prior to setting.
Image © K.Corda/K.Graves, 2014
Injection of a consolidating agent with a syringe and needle.
Image © K.Corda/K.Graves, 2014
Injection of the custom grout with a syringe and catheter.
Image © K.Corda/K.Graves, 2014
Infrared thermography was used to track and monitor the dispersal of grout beneath the surface of the fresco.
Image © K.Corda/K.Graves, 2014
Because injection grouting is a "blind" treatment, infrared thermographs helped to visualize the amount and movement of grout through voids behind the surface of the fresco.
Image © K.Corda/K.Graves, 2014
In preparation for injection grouting, catheter tubes were inserted through the drilled holes into voids behind the painted surface. Infrared thermographs helped to visualize the amount and movement of grout after injection.
Image © K.Corda/K.Graves, 2014
Upon completion of grouting, presses were used to help maintain contact between the detached layers of plaster until the grout had set sufficiently.
Image © K.Corda/K.Graves, 2014
Holes and losses in the fresco were filled with a lime mortar and reintegrated to the painting, creating a unified surface.
Image © K.Corda/K.Graves, 2014
Holes and losses in the fresco were filled with a lime mortar and reintegrated, creating a unified surface.
Image © K.Corda/K.Graves, 2014
Holes and losses in the fresco were filled with a lime mortar and reintegrated, creating a unified surface.
Image © K.Corda/K.Graves, 2014
Holes and losses in the fresco were filled with a lime mortar and reintegrated, creating a unified surface.
Image © K.Corda/K.Graves, 2014
Detail of the fresco before (left) and after (right) treatment.
Image © K.Corda/K.Graves, 2014
Detail of the fresco before (left) and after (right) treatment.
Image © K.Corda/K.Graves, 2014
Detail of the fresco before (left) and after (right) treatment.
Image © K.Corda/K.Graves, 2014
Sugar Cane, after treatment.
Image © Philidelphia Museum of Art, 2014
